
“What you put in is what you get out!”
Creating materials is a critical part of asset production for they can make or break the finest-looking models. Unfortunately, creating the materials can be repetitive and time consuming and the problem arises as early as the modeling stage when you plan out your details.

No matter if the materials are stylistic or realistic, the process of authoring multiple maps across several software packages is a lot of work. This can quickly turn into a troubleshooting process instead of the creative pleasure it should be!
For those who aren’t already familiar with Substance Designer, the beauty of this particular piece of software is that you can take care of a lot of texture maps at once through a node-based workflow.
Substance designer comes with many generators that the users have at their disposal to create all kinds of effects. These generators use map-based inputs that are baked from either a high or low poly model.
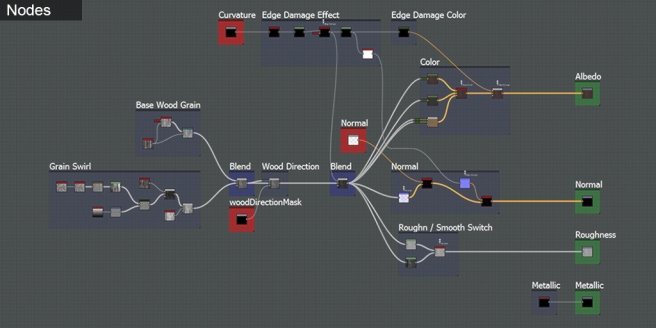
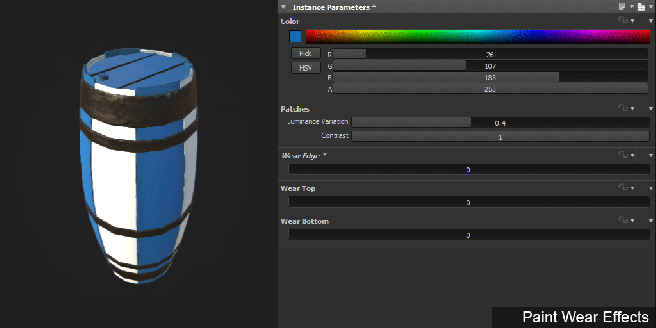
Substance Designer really shines when creating custom effects. We create our own generators completely with exposed parameters and custom in- and outputs. These give us the advantage of creating the effect we like once and hooking it up to many different assets. Spending hours roughing up your models in Zbrush is a thing of the past.
To take this a step further, we create custom material generators for our projects. Besides alleviating us from a lot of repetitive work, it comes with the added bonus of having consistent looking assets. All custom created materials and effects are stored within a library and can be used anytime.
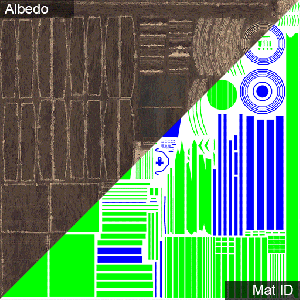
With a library we only have to worry about supplying the right types of input. We can, for example, bake out material ID maps, which are color-coded maps that ‘identify’ the type of material for the generators.
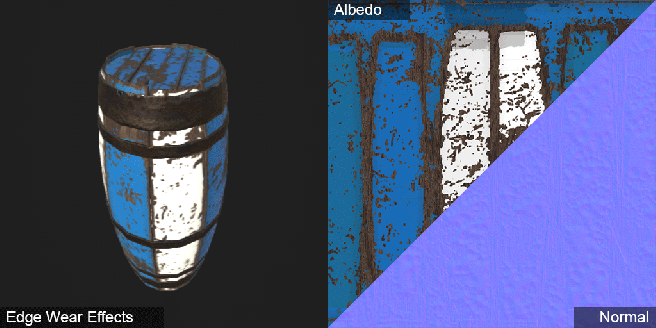
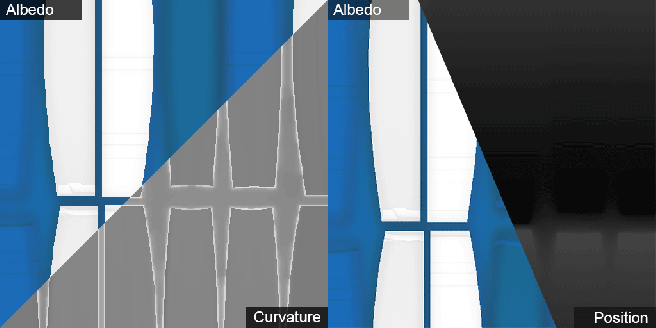
Maps like the curvature or position map are used to mask and modulate the effects, giving us a lot of control over the look and feel of the assets, indistinguishable from handcrafted textures.
When things change in the project, updating the assets to meet the new standards is a lot less challenging. Materials and effects can easily be added to the library as we see fit, which allows us to be flexible throughout the project.
Although Substance Designer has a steep learning curve, it’s fun, intuitive and fast once you get into it, making it well worth the time and effort.
Next blog post we’ll share our experiences with visual programming in Substance. One of the things we will discuss is how to run multiple effects under one slider.
If you have any questions or want to share useful tips yourself, comment below!
-DS
